My first christmas card of the year

Inlägget postat av on September 21, 2017 | | 447 kommentarer »


Hello again – and welcome back today!

I know, there’s still some time left til christmas. But there has to be the day when the first christmas card is shared. And since it’s nearly the end of september I thought it’d be okay to do that today. Ready?
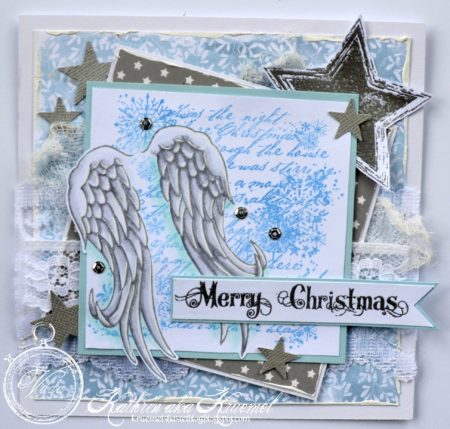
I didn’t go overboard regarding glitter etc so this turned out a more simple but still elegant card.

I used some grey and ice blue designer’s paper and matted both with white cardstock. The star from the Squares, Circle and Star stamp set was heat embossed using silver embossing powder and put between the layers. A few smaller die cut stars, cheesecloth and laces in different width were added for decorations.

This is the main panel of my card. Here I stamped the Wings onto white paper and colored them in with Copics. Then I used some masking tape to cover them and stamped the Christmascollage Background over/around the wings using ice blue ink. When cutting out the background I’ve cut around the wider parts of the wings which adds a little 3D effect.

I had to add at least a little sparkle by glueing a few small silver sequins onto the background. Then I’ve stamped the smaller “Merry Christmas” from the Merry Christmas x2 stamp set on a banner from white carstock and heat embossed it again before glueing it over parts of the wings and background.

Hope it wasn’t too early for a christmas card and you liked it. See you all next month!

Hugs, Kathrin


This post is posted by Kathrin


A fairy in the morning sun

Inlägget postat av on September 21, 2017 | | 449 kommentarer »


Hello everyone!

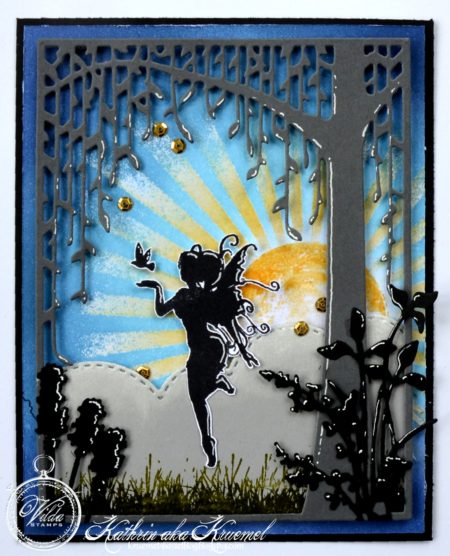
Welcome here today over at the Blog of Vildastamps. I am going to share two completly different cards with you today. Let’s start with the first one, which I used one of the cute fairies from the Puck & Sebille stamp set for:

I used quite a few die cuts to create this scene. Main element is the willow tree that was cut from dark grey cardstock. Behind it I’ve added a row of clouds. I used foam tape to put the different layers together so I had to stamp the grass from the Grass kit onto the cloud level. I didn’t want it to look like a single colored surface so I used Distress Ink Peeled Paint first and then partially stamped the grass again using Black Soot.

The black flowers I’ve added to the front add some more depth to my scene.

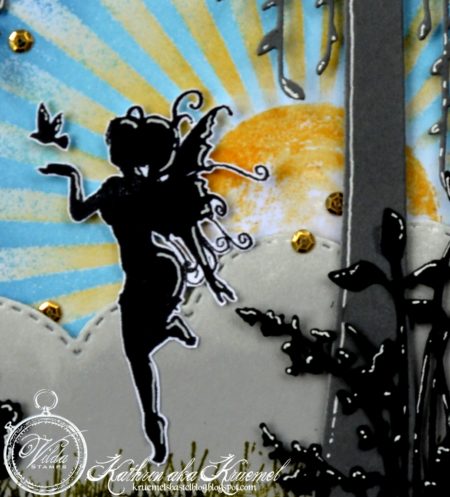
This fairy is such a cutie. I can’t tell if it’s Puck or Sebille, but I love how she seems to teach the little bird how to fly. As I’ve mentioned I used 3D foam on my card so I wasn’t able to just stamp her into the scene. Instead she was stamped on white carstock, then cut out and glued into place.

For the sun I used the circle from the Squares, Circle and Star stamp set. It was stamped using yellow ink, then I used a stencil to add the rays around it. To be able to cover the background with blue ink I used clear embossing powder on all the yellow areas.

A few small golden sequins were all I used for decorations here – they look a bit like a few last stars shining in the sky before the sun is fully up.

Hope to see you all again later today for my second creation of this month.

Hugs, Kathrin


This post is posted by Kathrin


Wizard Traveler’s Notebook Insert

Inlägget postat av on September 19, 2017 | | Inga kommentarer »


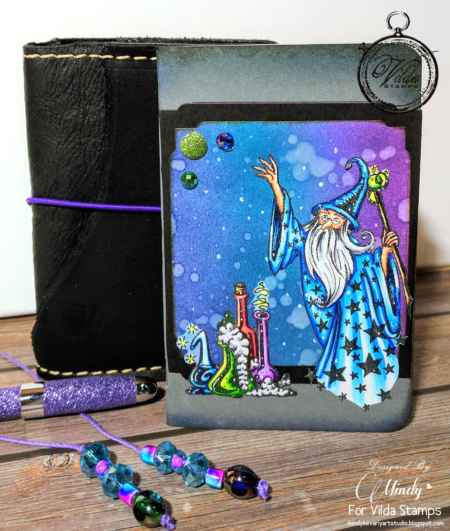
Hello Everyone! Today I want to share with you a Wizard Traveler’s Notebook Insert that I created using stamps from Vilda Stamps.

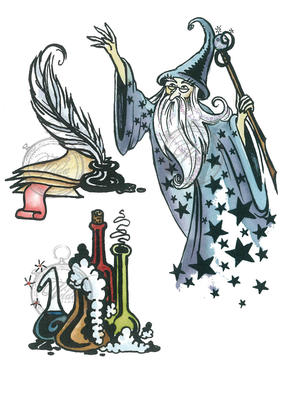
To create my Traveler’s Notebook Insert I used Vilda Stamp Wizard with Potions and Feather Pen V814:

http://shop.textalk.se/en/article.php?id=16232&art=24516668

Copics used:

Wizard: E11, E00, E000, RV21, B29, B05, B12, B00, 0, YG06, YG11, Y00, C3, C1

Bottles: B05, B12, B00, YG06, YG11, Y00, V09, V04, BV000, R59, R35, R22, RV42, C3, C1


To make my inserts, first I stamped the Wizard and bottles stamps onto 110 lb. plain white card stock. Next I colored the images in with Copics. I then fussy cut the images and set them aside. After that I used a blank field notes insert and inked around the edges with Dusty Concord Distress Ink to give it a vintage feel.

Next I cut a black and a white frame to fit the front of my insert. I then attached the black frame to the center. After that I used Distress ink in Chipped Sapphire, Peacock Feathers, and Dusty Concord to create my mystical sky on the plain white frame. After I was done blending the distress inks, I then lightly sprayed the entire background with a water bottle to create some texture and interest. Once the background was dry, I then attached it on top of my black frame on the insert.

To Finish I attached the wizard and the bottles, and added a few various rhinestone and glitter embellishments. Thank you so much for stopping by! I hope that my project has inspired you to try out your own creations with these Gorgeous stamps from Vilda Stamps!


This post is posted by Mindy


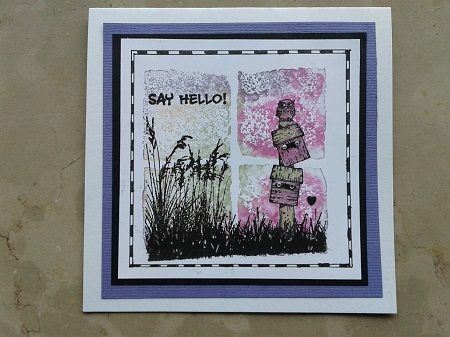
Background Blocks

Inlägget postat av on September 14, 2017 | | 576 kommentarer »


Background Blocks

Stamp V850 blocks
Stamp V436 grass,
Stamp V219 Mailbox
Text stamp of your choice
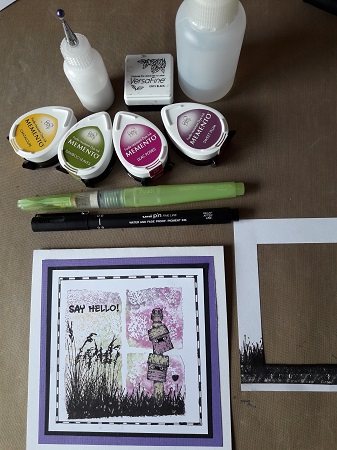
Waterproof ink black
Memento various colors
Spray bottle of water
Waterbrush
Fine liner black
Double card white 13 x 13 cm.
Purple 11.5 x 11.5 cm.
Black 10.5 x 10.5 cm
White smooth for stamp paper 10 x 10 cm

First, create a template with a frame to mask the stamp blocks.
Beink the blocks with different colors Memento. Spray with water and stamp. GET GOOD DRY. Put the mask over it and place the grass and mailbox.
Color the mailbox with the same colors and a waterbrush.
Draw with fine liner double line and color black patches.

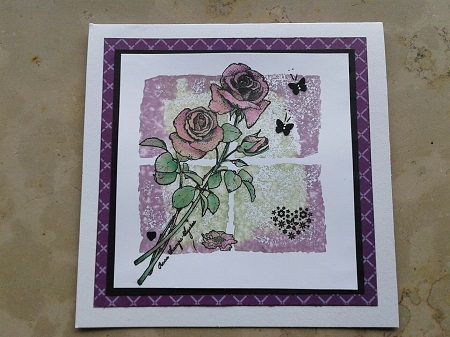
Below the same base but other stamps on top. V697 and V749. Punch of small black butterflies. No double lines.
Good luck.


This post is posted by Karin


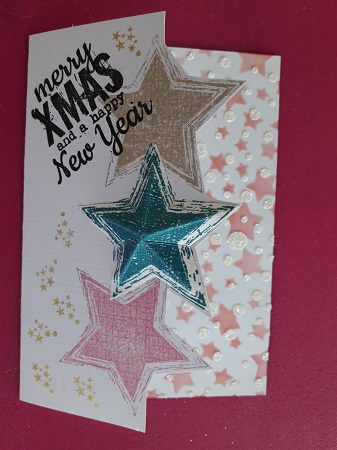
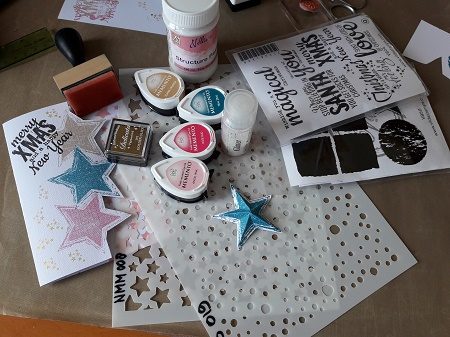
Background Stars meet Christmas

Inlägget postat av on September 14, 2017 | | 314 kommentarer »


t’s September and the rain is ticking the window. Inside, therefore, stay. Time for the first Christmas cards.

I had this stamp V 850 for a while and not used yet. But … .. now I am no longer able to stop. What a potential.

Necessities
Paper: white linen double card 10 x 15 cm, 2x left white or slightly different from basic map
Stamp V804 text and small stars party
Stamp V 850 star
Waterproof stamp ink black
Memento: Angel Pink, Rose Bud, Toffee Crunch, Teal Seal
Stamp cushion gold
Structure of pasta white
Glitter fine white
Small pumpkin
Nellie Snellen mixed media stencils NMMS 008 stars and 019 dots
Folding leg, stamping blocks, ink applicator, ruler, pencil, rubber, scissors

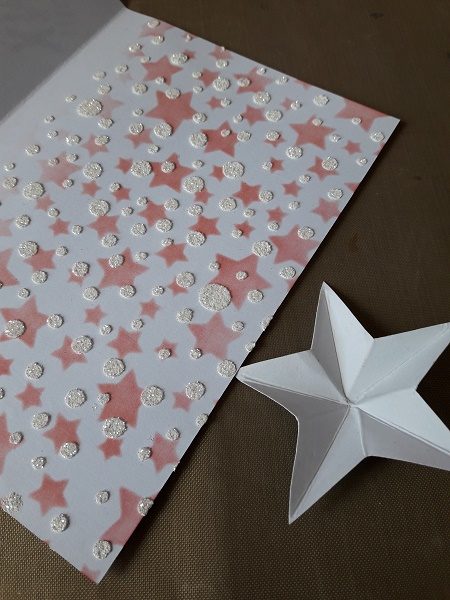
Background is inside, with stars stencil and rose bud. To do this, dry the stencil with polishing paste white. Spread glitter white on it. Turn card
Right side front measures 5 cm. Put thin pencil stripe. Create thin paper from the star. Cut out.
Stamp with Teal Seal on sticker paper a star. Cut out. Rills with mountain and valley lines. See picture.
Stamp on the map. Hold the drawn guide line as the center of the star. Start and stamp with blue the middle star. Mask this. Stamp Now Above Too Crunch Brown Bottom Star Angel Pink Pink. Loose little stars with gold. Text in corner Versafine black.
Cut the card along the stamped star border. Paste the loose yellowed blue star on the middle star. Only glue on the points. Place a pumpkin in the middle as an increase. Son the star stays up.
Have fun making this Christmas card.


This post is posted by Karin


Cadilac

Inlägget postat av on September 2, 2017 | | 315 kommentarer »


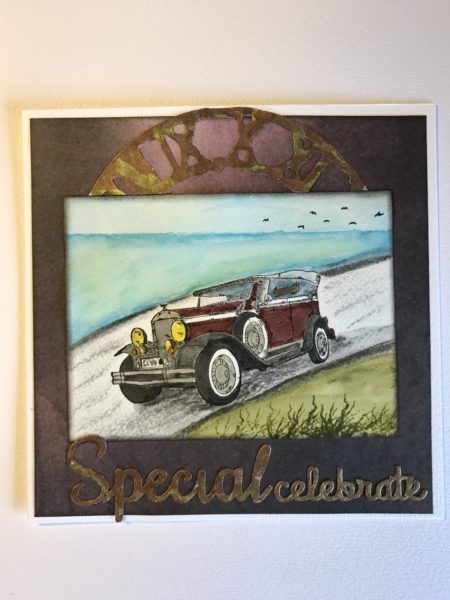
Har ju alltid gillat bilar.

Detta är ju en Cadillac som jag målat med distresser. Den fick vara i ett kustnära landskap.

kram Kerstin P

Cadillacen har nr v704


This post is posted by Kerstin


Silouetter nature

Inlägget postat av on August 30, 2017 | | 444 kommentarer »


Hi everyone I would love to share with you 2 fabulous little cards made with stamps from vilda stamps, I really hope you like it and it inspires you to have a go and making something similar
BIG HUGS XXXX


stamped onto watercolor backgrounds with black stazon ink


This post is posted by Tracy


Hjärtliga gratulationer

Inlägget postat av on August 22, 2017 | | 725 kommentarer »


Hej!


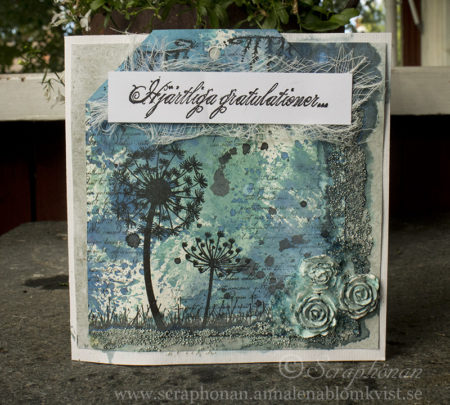
Idag är vardagen tillbaka hemma hos oss, och jag är tillbaka på bloggen efter en sommar med så gott som nästan inget pyssel alls. Men nu när de mörka kvällarna kommer så älskar ja att åter krypa in i min pysselhörna och skapa.


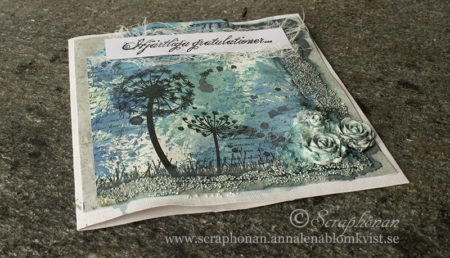
Idag bjuder jag på ett grattiskort till min bror som fyller år till helgen. Det är ett mixed media kort med en bakgrund med Distress oxid och olika stämplar.


Stämplar:

V 858 Silouetter natur

V  857 Fantasy 2

V 436 Gräskit

V 260 Brevbakgrund


Med detta önskar jag er en fortsatt trevlig dag och hoppas att ni pysslar lugnt!


Kram Anna-Lena aka Hönan


This post is posted by Anna-Lena


Related Posts Plugin for WordPress, Blogger...